Shells
Shells are interfaces for interacting with computers that usually involve a command prompt focused on text input, like when you see someone doing computer science in the movies lol.

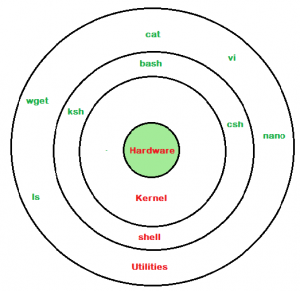
Linux shells are command-line interfaces (CLIs or some keywords) that allow users to interact with the operating system by typing them. The shell interprets these commands and communicates with the kernel to perform tasks. There are several types of shells available on Linux, each with its own set of features, syntax, and capabilities.
Types of Linux Shells
Let's begin by the two most famous shells, sh and bash
- Bourne Shell
shThe original Unix shell written by Stephen Bourne at AT&T Bell Labs. It is simple and has been the basis for many other shells.
- Bourne-Again Shell
bashThe most popular and widely used Linux shell today, bash is the default shell on many Linux distributions and macOS. It's an enhanced version of the Bourne Shell, incorporating features from the Korn shell (ksh) and C shell (csh). Supports tab completion, command history, and job control, along with advanced scripting capabilities. bash scripts are commonly used for automating tasks and managing system configurations.
- C Shell
cshDeveloped by Bill Joy at the University of California, Berkeley, the C shell's syntax and usage are inspired by the C programming language, making it appealing to C programmers. Offers features like built-in command-line editing, aliases, and job control. It introduced many interactive features that influenced the development of other shells.
- Korn Shell
kshDeveloped by David Korn at AT&T Bell Labs, ksh combines features of both the Bourne shell and C shell, with improvements in scripting capability and command-line interaction. Provides associative arrays, functions, and improved I/O redirection, making it powerful for both interactive use and scripting. It's known for its compatibility with the Bourne shell scripts while offering more advanced features.
- Z Shell
zshfor the fancy macOS users 😎A highly customizable shell, zsh incorporates features from bash, ksh, and tcsh, offering extensive customization, themeing, and plugin support through frameworks like Oh My Zsh. Enhances many aspects of the Bourne Shell and includes powerful features like improved tab completion, spell checking, and loadable modules. It's particularly popular among developers for its user-friendly features and extensive customization options.
For the non Linux users out there, there is a lot of other shells for example Windows Command Prompt cmd.exe or PowerShell (command-line shell and scripting language designed by Microsoft for task automation and configuration management. It's built on the .NET framework and is available on Windows, Linux, and macOS.). We will cover only Linux bash/zsh shell in this article.

Tip
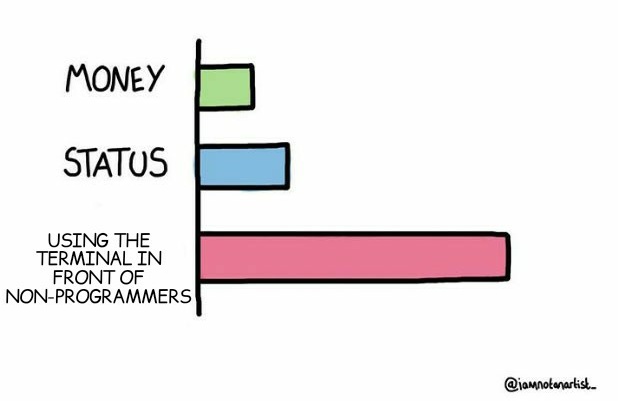
You can customize your bash or zsh shell with the awersome Oh-my-bash plugings and same for zsh to be a shell ninja and impress your non tech friends 🥷🏼
It involves some shell configurations like we will seen above here ⬇️
Basic shell configuration
The shell configurations are defined in severals files and your shells will read configuration files in various circumstances. These files usually contain commands for the shell and are executed when loaded; they are usually used to set important variables used to find executables, like $PATH, and others that control the behavior and appearance of the shell. The table in this section shows the configuration files for popular shells. More on wikipedia
Edit your .bashrc
If you took a look on the wikipedia page above you should have noticed a certain file call .bashrc, this file is one of the main bash shell configuration. If you want to explore more about the .bashrc you can read this excellent article What is .bashrc file in Linux?
First we will talk about aliases, an alias is a feature in your Bash shell that allows you to create your custom shortcuts names (variables) for linux commands. It enables you to define a more memorable name for a command or a series of commands (which can be very long as you may know lol), making it easier and faster to play with.
For example, the classical alias is ll to represent the command ls -l, which displays a detailed listing of files and directories. So, instead of typing ls -l you can simply use the ll command.
Aliases are defined using the alias command followed by the desired alias name, an equals sign (=) like bellow :
alias name=value
alias name='command'
alias name='command arg1 arg2'
alias name='/path/to/script'
alias name='/path/to/script.pl arg1'
Aliases are specific to the shell session in which they are defined, and they can be created, modified, or deleted on-the-fly. However, to make aliases persist across different sessions, they can be added to the shell's configuration file (e.g., .bashrc, .bash_profile), ensuring they are loaded automatically whenever a new session is started.
Add some secret sauce
Here is my custom .bashrc file 🤗
# control cd command behavior
alias cd..='cd ..'
alias ..='cd ..'
alias ...='cd ../../../'
alias ....='cd ../../../../'
alias .....='cd ../../../../'
alias .4='cd ../../../../'
alias .5='cd ../../../../..'
alias ll='ls -alsh'


# handy short cuts #
alias h='history'
alias j='jobs -l'

# vim stuff
alias vi=vim
alias svi='sudo vi'
alias vis='vim "+set si"'
alias edit='vim'

# quickly list all TCP/UDP port on your server
alias ports='netstat -tulanp'

# shortcut  for iptables
alias ipt='sudo /sbin/iptables'
alias iptlist='sudo /sbin/iptables -L -n -v --line-numbers'
alias iptlistin='sudo /sbin/iptables -L INPUT -n -v --line-numbers'
alias iptlistout='sudo /sbin/iptables -L OUTPUT -n -v --line-numbers'
alias iptlistfw='sudo /sbin/iptables -L FORWARD -n -v --line-numbers'
alias firewall=iptlist


# update on one command
alias update='sudo apt-get update && sudo apt-get upgrade'
alias apt-get="sudo apt-get"
alias updatey="sudo apt-get --yes"

# become root
alias root='sudo -i'
alias su='sudo -i'

#
# system memory, cpu usage, and gpu memory info quickly
#

# pass options to free
alias meminfo='free -m -l -t'
# get top process eating memory
alias psmem='ps auxf | sort -nr -k 4'
alias psmem10='ps auxf | sort -nr -k 4 | head -10'
# get top process eating cpu
alias pscpu='ps auxf | sort -nr -k 3'
alias pscpu10='ps auxf | sort -nr -k 3 | head -10'
# get server cpu info
alias cpuinfo='lscpu'
# get GPU ram on desktop / laptop##
alias gpumeminfo='grep -i --color memory /var/log/Xorg.0.log'
# disk usage
alias df='df -H'
alias du='du -ch'
you can list all your aliases with the command :
alias
Editors
Mastering text editors like Vim and Nano is crucial for developers, particularly those working in Linux environments without GUI. These editors are not just tools for writing and editing code but for efficiency, precision, and control over your development environment. For example if you handle big text, json or csv data files you can not open it with excelor any GUI software, and that's an other reason why you need to master terminal text editor 😎
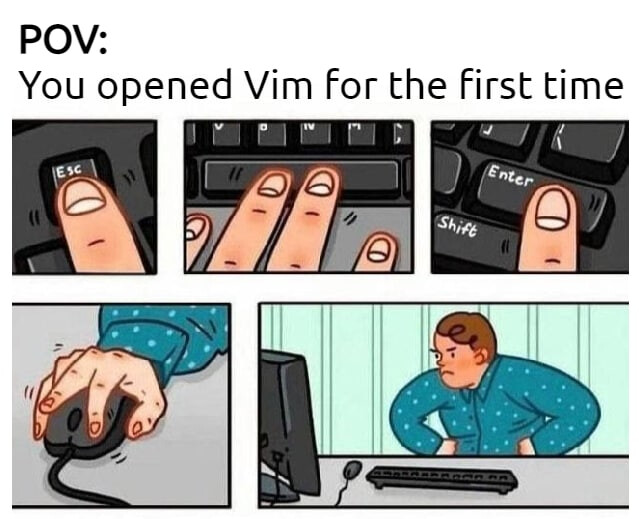
In this article I will not present you all the text editors (they are many of them lol) but I will be focusing on Vim since it is the one I used the most. I know Vim can be scary at first but when it is your friend you will not regret it 😂
Vim
Vim (for vi improved) is a free and open-source, screen-based text editor program released to the public in 1991. Vim is designed for use both from a command-line interface and as a standalone application in a graphical user interface. More on wikipedia.

5 Vim key concepts
Certainly! Vim is a powerful text editor that uses a combination of modes, commands, and shortcuts to provide an efficient and flexible editing experience. Here are five key concepts that are foundational to understanding and using Vim effectively:
- Modal Editing
Unlike most text editors, Vim operates in different modes, primarily Normal, Insert, and Visual modes.
- Normal Mode: Used for navigating within the text and executing commands. You can move around, delete text, copy text, and more, without needing to hold down any modifier keys like Ctrl or Shift.
- Insert Mode: Used for inserting text. In this mode, Vim functions like a typical text editor, inserting the characters you type into the document.
- Visual Mode: Used for selecting blocks of text. Once text is selected, you can perform operations on it, such as copying, cutting, or applying custom formatting.
- Command Composition
Vim commands can be composed like building blocks to perform complex editing tasks with just a few keystrokes. For example, d3w deletes the next three words, where d stands for "delete," 3 is the count, and w signifies "word." Importance: This allows for highly efficient text manipulation, enabling users to perform repetitive or complex tasks quickly once they have mastered the basic commands.
- Movement Commands
Vim offers a rich set of movement commands that allow you to navigate your text file efficiently. These include character movements (
h,j,k,lfor left, down, up, right, respectively), word movements (w,e,bfor start of the next word, end of the current/next word, start of the previous word), and line movements (0,^,$for start of the line, first non-blank character, end of the line). Importance: These commands reduce the need for arrow keys and mouse, enabling you to keep your hands on the keyboard and maintain your typing rhythm. - Buffers, Windows, and Tabs
Vim uses buffers to hold opened files, windows to view buffers, and tabs to hold one or more windows. This system offers a powerful way to work with multiple files and views simultaneously. Buffers: The in-memory text of an open file. You can switch between buffers without opening new windows. Windows: Splits in the Vim interface that can show different buffers or different parts of the same buffer. Tabs: Collections of windows. Each tab can have its own layout of windows, allowing for a highly customizable workspace. Understanding and using these allows for efficient management of multiple files and views, greatly enhancing productivity in complex projects or when comparing and editing multiple files.
- Search and Replace
Vim provides powerful search and replace functionalities. You can search for text using /text and navigate through occurrences with
n(for next) andN(for previous). Replace operations can be performed with the:s/search/replace/flagscommand, where flags can specify the scope (e.g., globally in the file or only in the selected lines). These features make finding and modifying text across large files or projects quick and easy, significantly speeding up the editing process.
You can take a look at this articles if you want to know more about Vim :
- How to Use Vim – Tutorial for Beginners
- Learn Vim Progressively
- Classic SysAdmin: Vim 101: A Beginner’s Guide to Vim
- VIM tutorial for beginners
- Learn Vim (the Smart Way) FREE github Book
- 11 Pro Vim Tips to Get Better Editing Experience
- 50 Useful Vim Commands
After that if you take the time to read it all I think you will be a real Vim 🥷🏼
Good things to know
As you may know you can not master evey command or worst know them all, the important thing is to know about key concepts and leverage them to find solution or to optimise your every day developer workflow 😎
Shell latency
I highly recommend this very good article about types of shell latency. In this article the concept of terminal latency is explored, highlighting how even slight delays, measured in milliseconds, can make certain shells and editors feel sluggish compared to others that seem more responsive.
Create your shells
Now that you know what is a shell, if you know a little about python or programming in general you can create your own personnal shell. For creating your own shells, the Python standard library offers the cmd module. The Python CmdModule wiki page provides a comprehensive guide to this module and its functionalities.
This great article call Give your Python program a shell with the cmd module presents a brief tutorial on utilizing cmd to craft a basic shell interface.
You can also take a look at Why Create a New Unix Shell? an article by the Oil shell's developer, discussing the motivation behind developing a new shell amidst the existence of others like Bash, zsh, PowerShell, and KornShell.
Tips and tricks
- Understund all shell commands with explainshell
- Shell productivity tips and tricks: navigating history, autocompletion, and pattern matching
- 10 must-know Bash shell scripting tips and tricks for beginners
- 10 must-know Bash shell scripting tips and tricks for beginners
- Linux Command Line – Tips and Tricks
- 21 Super Handy Linux Command Tips and Tricks That Will Save you a lot of Time and Increase Your Productivity
- Top 35 Linux Console Tips and Tricks From Practical Experience
- Of course for the fun of it (if you want to see star wars on your terminal for example 😂) https://www.tecmint.com/funny-linux-commands/
Wrap it up
Now that you are a true linux shell ninja master you can impress your non tech friend with some fancy commands, shell personnalisation and even to show some sf fils (star wars) on your terminal 😂
Hope you learn a thing or two in this article, thanks for reading for the next part we will continue to dig deep into Linux ⛏